Download and connection to the model / user registration
STEP 1
Download the application and connect to the model
For PC
1. Download exe file of the application and USB driver
Click at top of the webpage or on the DRONE RACER app icon on the right to start download of the application installer and the USB driver.
Download to any folder on your computer and check that the software file above are located in the same folder.
▼System Requirements
• Computer running Microsoft Windows7, Windows8, Windows8.1, Windows10 with at least one USB port(USB standard 1.1/2.0/3.0).
Proper function on emulators etc. is not guaranteed.
• Connect to the internet to download the SETTING MANAGER.
* Microsoft Windows7, Windows8, Windows8.1, Windows10 are the registered trade marks of Microsoft in USA and all other countries.
* Kyosho does not assume any responsibility for the use of the SETTING MANAGER. Use of the SETTING MANAGER is at the user’s own risk.
Download
Windows
▼
 ▲
Click to start download of the application installer and driver for the USB adapter.
▲
Click to start download of the application installer and driver for the USB adapter.
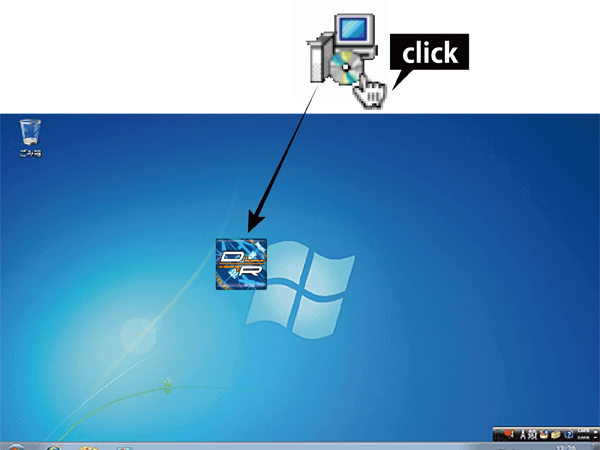
2. Installing the Application
Double-click the downloaded Installer “ ![]() ” icon. The application icon will appear on the Desktop when the installer instructions are followed. This completes installation. Continue installation of the USB driver starts.
” icon. The application icon will appear on the Desktop when the installer instructions are followed. This completes installation. Continue installation of the USB driver starts.
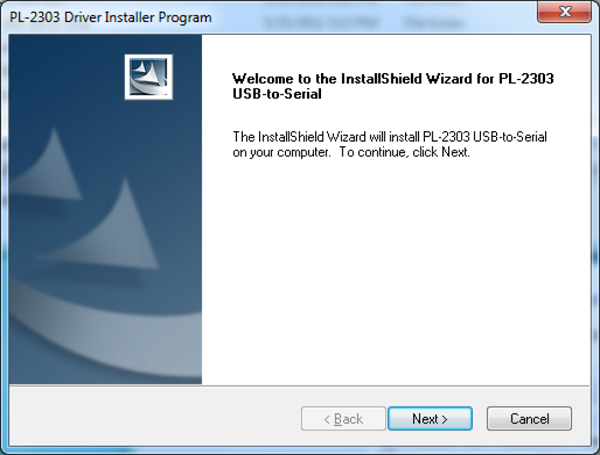
3. Installing USB driver After “Install” is shown on the screen, click “Next”.
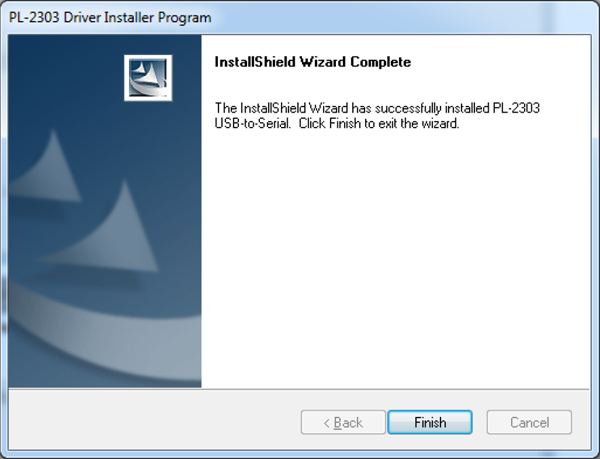
4. USB driver installation is complete Complete the installation according to the steps shown on the screen. When the screen shows the following, installation is initiated. *Completing installation may take several minutes.
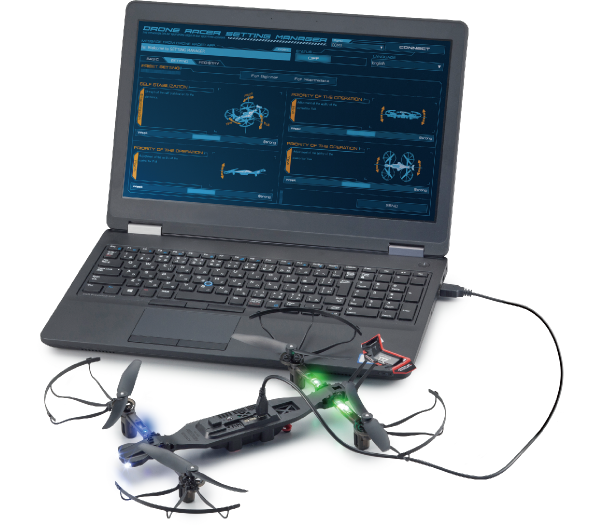
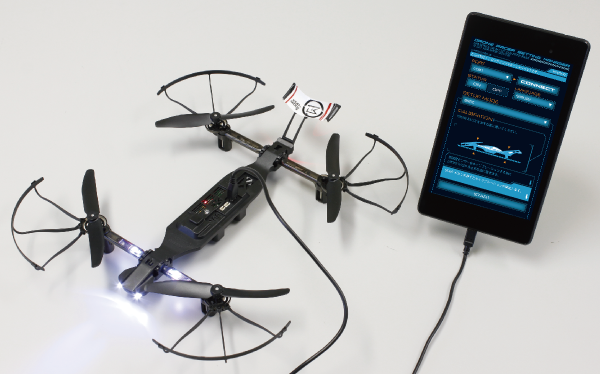
5. Connecting the model to your computer Connect the included USB cable to the model, and directly to a USB port on your computer. Connect the model battery and open the SETTING MANAGER application. * May not function properly if connecting via a USB hub or USB extension cable.
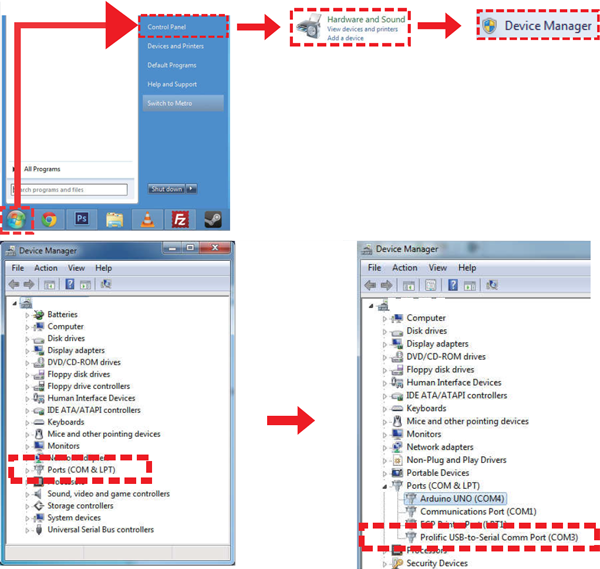
6. Checking USB port number While the USB cable is connected, click Start > Control Panel > Hardware and Sound > Device Manager. * Display may be different depending on your computer.
Next, double-click “Port” and check that “Prolific USB-to-Serial Comm Port(COM3)” is displayed.The USB port number is displayed in COM3. The number will be different depending on the port in use.
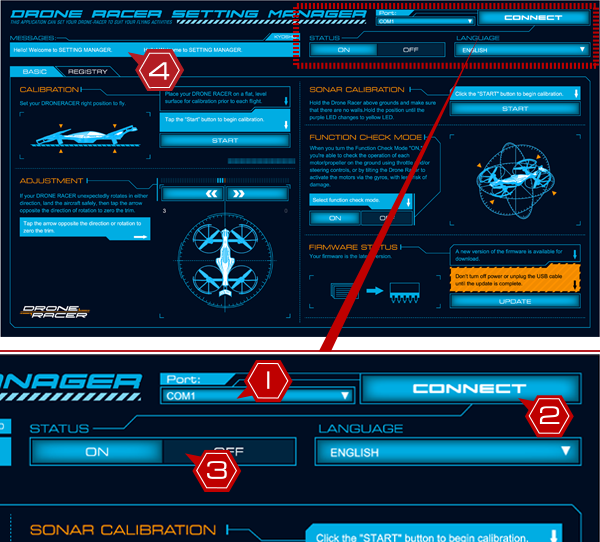
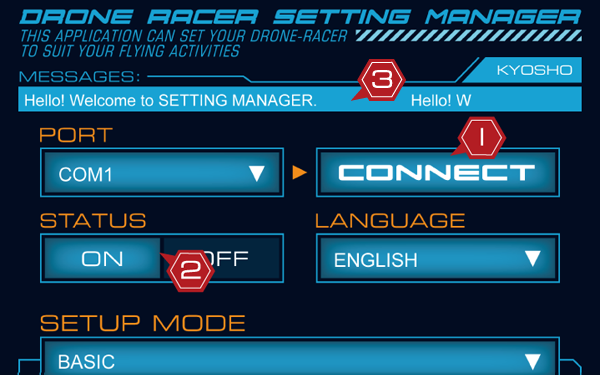
7. Communication between the model and your computer ①Check the USB port number being used is selected ②Click the “CONNECT” button. ③If “STATUS” changes to ON, connection between the model and SETTING MANAGER in successful. Drone Racer's status is displayed in the message bar ④. Always check here.
For Android terminals supporting “HOST” mode
1. Access to Google play
Click at top of the webpage or the DRONE RACER app icon on the right to open the application install screen.
*Android devices that do not support “HOST” mode cannot be used.
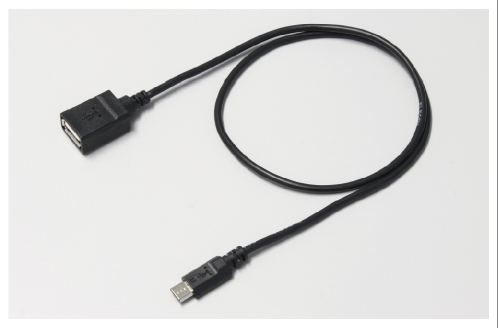
*Optional OTG compatible USB (micro B to A) conversion adapter is required.
Download
Android
▼
 ▲
Click to open the application install screen on Google Play.
▲
Click to open the application install screen on Google Play.
2. Installing the Application Select the install button and download the app. *Compatible OS : Android 4.3 minimum
3. Connecting model with Android Connect the included USB cable to an OTG compatible USB (micro B to A) conversion adapter and connect the model to the Android terminal. Next, connect the model battery and open the SETTING MANAGER application.
4. Completing connection of model with Android ①Click the “CONNECT” button. ②When the “STATUS” changes to ON, connection of model and SETTING MANAGER is successful. Drone Racer's status is displayed in the message bar ③. Always check here.
STEP 2
User Registration
PART 1
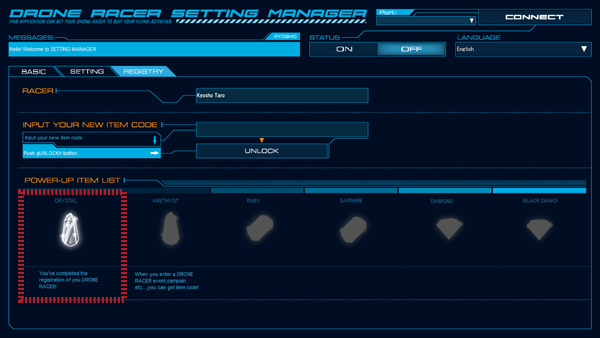
Register user “REGISTRY”. Get POWER UP items!
At first, only basic model adjustment functions ① can be used on the “BASIC” tab.
After purchase, completing the user registration enables the “SETTING” tab that includes additional adjustments of flight chara cteristics, and allows support information such as firmware updates to be sent to your email address.
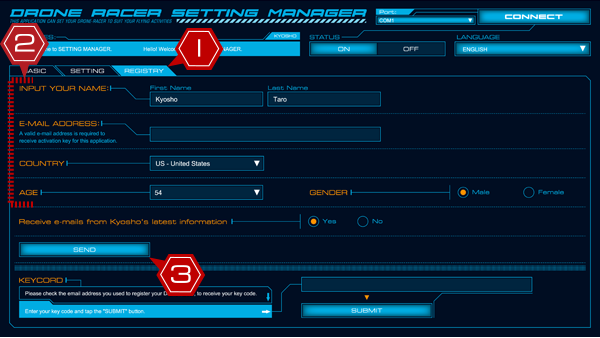
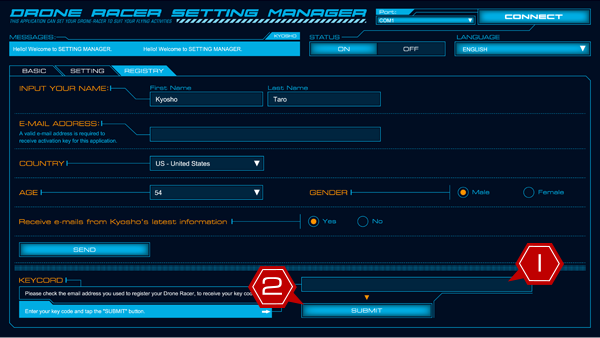
1. Input the user information ①Select “REGISTRY” from menu tab. ②Input user information (Name, email address, country of residence, age, gender) ③then press “Send” button.
PART 2
Register key codes and get POWER UP items!When user registration is completed, "key code" is sent to the registered mail address. Enter the Key Codes on the REGISTRY tab (the same tab used for User Registration) to add POWER UP items and add new functions to the application.
1. Checking key codes “KEYCODE” will be sent to your email address. Check your email account used for registration.
2. Input and transmission of key codes Once the “KEYCODE” has been received, ①input the code into the “KEYCODE” blank space below and ②press the “SUBMIT” button.
3. Checking POWER UP items You will get the “CRYSTAL” POWER UP item. The “SETTING“ tab will be released and more setting options will become available.